You’ve caught a glimpse of it from time to time, and your wife or partner might’ve even let you touch it in a moment of weakness. We’re talking about, of course, the oven.
There’s no reason you can’t overcome your performance anxiety and make the oven work for you. Once you grasp the following basics, you will be well on your way to harnessing its powers.
Temperature control
There are only five temperature options that really matter when you’re cooking without a recipe:
200°F will warm anything from bread to dinner plates.
350°F is your default temperature for baking, cooking roasts, chicken, fish, mac ’n’ cheese, and most foods that need to be reheated.
400°F is the magic temperature that will transform simple vegetables into lip-smacking candy bombs. Chefs call it caramelization.
500°F will turn your oven into a pizza oven.
Oven management
The choice of which rack to use can be nuanced. If you want the top of your food to brown faster, place it on a higher rack. If you want the bottom to cook or brown faster, put it on a lower rack. When in doubt, split the difference and use the middle rack.
Some ovens, particularly older ones, do not cook foods evenly, especially over long cooking times. Compensate for the uneven heat by rotating the pan 180 degrees every 30 minutes or so. If you’re cooking on two racks simultaneously, the food on each level will cook at different speeds and brown differently. For uniform results, swap out levels and rotate each pan 180 degrees every 30 minutes.
When you’re ready to take the plunge, here are a few recipe to get you started, perfect for the novice who wants to start using his oven for something more ambitious than just reheating leftovers.
Salami crisps
If a potato chip and a beef jerky hooked up, these salami chips would be their love child. All it takes is 15 minutes of oven time to transform off-the-rack salami slices into crispy snacks that are perfect on their own, or with your favorite dip.
Preheat oven to 300°F.
Line a sheet pan with parchment paper and set a baking rack in it. Transfer 4 ounces of your favorite thinly sliced salami to the rack, being careful not to overlap.
Bake in the center of the oven for approximately 15 minutes, or until the rounds of salami start to brown on the edges. Remove from oven and let cool for 15 minutes. At this point they should be crispy. Serve on their own, or with your favorite dip. Refrigerate leftovers.
Yield: about 24 slices
One-pan braised chicken thigh dinner
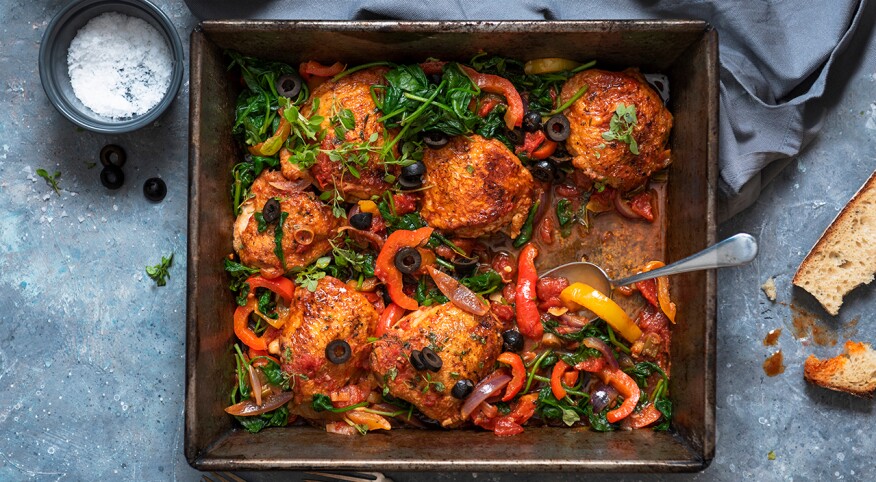
This one-pan dish relies on two of your oven’s natural-born talents — braising and reducing — to coax a remarkable amount of flavor out of a package of chicken thighs and handful of everyday ingredients.
Preheat oven to 325°F. Set oven rack in the center of the oven.
To a large bowl, add four large chicken thighs (skin-on, bone-in). Pat down with a generous amount of salt and pepper. Toss with ¼ cup flour, making sure the flour coats all the skin.
In your largest cast-iron or heavy-bottom frying pan (ideally 12 inches), over medium-high heat add 2 tablespoons of olive oil. Set chicken skin-side down in pan and sear for about 8 minutes, or until the skin turns golden brown. Flip thighs.
Add one red onion (quartered top to bottom through the core) and one fennel bulb (trimmed and quartered top to bottom through the core), pointy sides up, and nestle in four carrots (trimmed, and halved lengthwise), six fingerling potatoes (halved lengthwise) and 12 garlic cloves (peeled). If they don’t fit perfectly, just stuff them in. Everything will shrink as it braises.
Add one cup white wine and two cups of chicken stock to bring liquids roughly three-quarters of the way up the chicken. Top with 12 sprigs of rosemary and one lemon sliced thinly, and drizzle with olive oil. Bring to a simmer, then turn off heat. Cover pan tightly with a lid or aluminum foil and transfer to the oven.
Bake for 30 minutes. Remove foil, and bake for another hour, or until the veggies are browned and the liquid has reduced by about two-thirds. Check occasionally during the last 30 minutes to make sure liquids don’t reduce too much and blacken at the bottom of the pan. If less than a half inch of liquid remains, add extra stock or water, a half cup at a time.
Ten minutes before the chicken is done, nestle two cups of your favorite greens (spinach, Swiss chard, broccolini) into the liquid between the chicken and veggies, so that they simmer.
Set out shallow bowls and serve family-style directly from the pan.
Pro tip: Pan will be extremely hot. To be safe, drape a dish towel over the handle so that no one inadvertently grabs it.

Stocksy
Follow Article Topics: Eating-&-Drinking


